Instruction guide WeePie Image Overwrite Plugin
This instruction manual helps you with setting up and configuring the Weepie Image Overwrite Plugin. We’ve tried to make a selection for some points you may need help with. If something isn’t clear, missing or incorrect, feel free to contact us.
Table of contents
A. How to install the Plugin
B. How to update the Plugin
C. How to overwrite an image
D. How to edit image filename and/or image fields
A. How to install the Plugin
- Unzip the download file and upload the “weepie-framework” and “weepie-image-overwrite” folder to the ‘/wp-content/plugins/‘ directory.
- Activate the “WeePie Framework” Plugin through the ‘Plugins’ menu in WordPress.
- Activate the “WeePie Image Overwrite” Plugin through the ‘Plugins’ menu in WordPress (IMPORTANT: the “WeePie Framework” Plugin must be activated before activating the “WeePie Image Overwrite” Plugin).
You’re done!
B. How to update the Plugin
- Deactivate the “WeePie Image Overwrite” Plugin
- Deactivate the “WeePie Framework” Plugin
- Remove the OLD plugin files: “WeePie Framework” and “WeePie Image Overwrite”
- Upload the new files: “WeePie Framework” and “WeePie Image Overwrite”
- Refresh the WordPress Plugins page
- Activate the “WeePie Framework” Plugin
- Activate the “WeePie Image Overwrite” Plugin
You’re done!
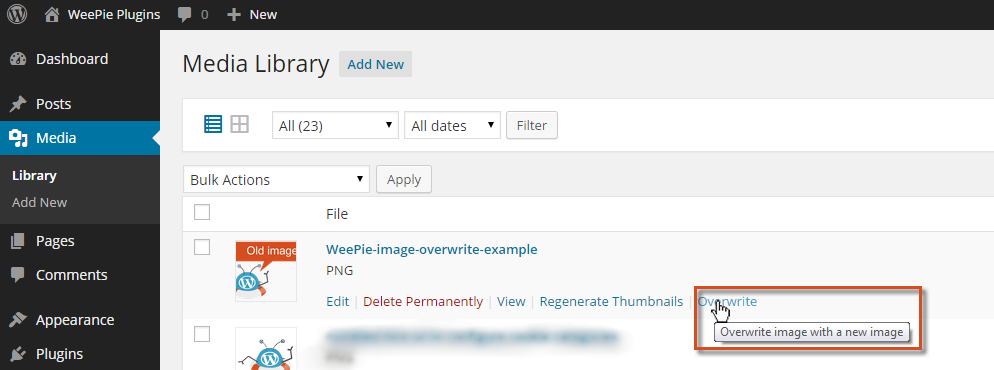
C. How to overwrite an image
- Go to your “Media Library“
- Select the image you want to replace and click on the link “Overwrite”
 The WeePie Overwrite environment will appear
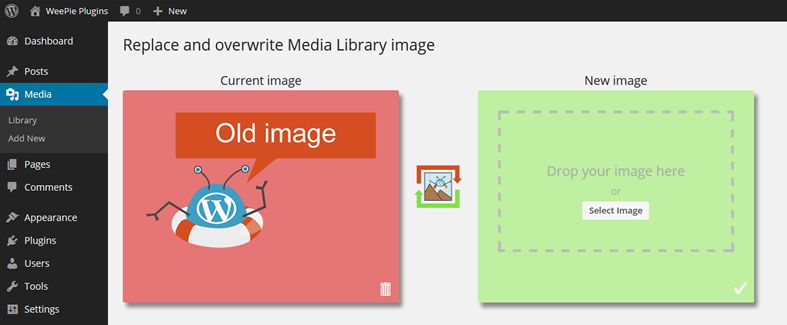
- Drop your new image into the “New image” box or upload your new image by clicking on the “Select Image” button
- Optional: Change the name (or more fields) of your image
- Click on the button “Replace now!”

The image will be replaced.
When everything is replaced succesfully, your Media Library overview will open with a ‘succes’ message and your overwritten image in it.
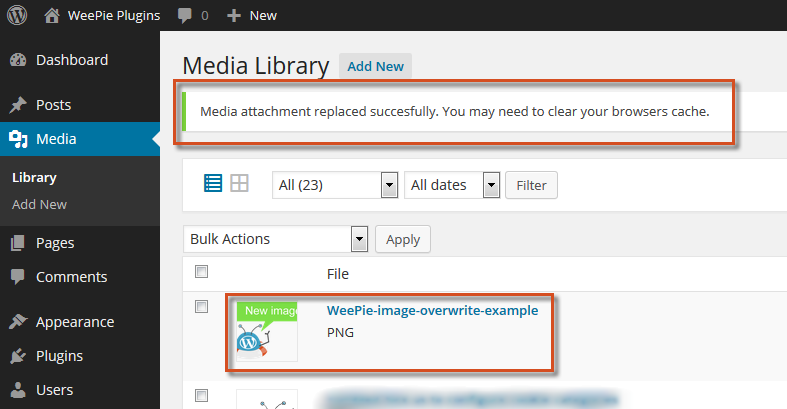
Your image is replaced and overwritten now!
Note: It could be that your new image isn’t visible yet in you overview. Press ‘Ctrl’ + ‘F5’ in that case.
D. How to edit image filename and/or image fields
After you have uploaded your new image with the “New image” box:
- Edit the filename and/or click on “Edit more fields” and edit one or more of the the image fields:
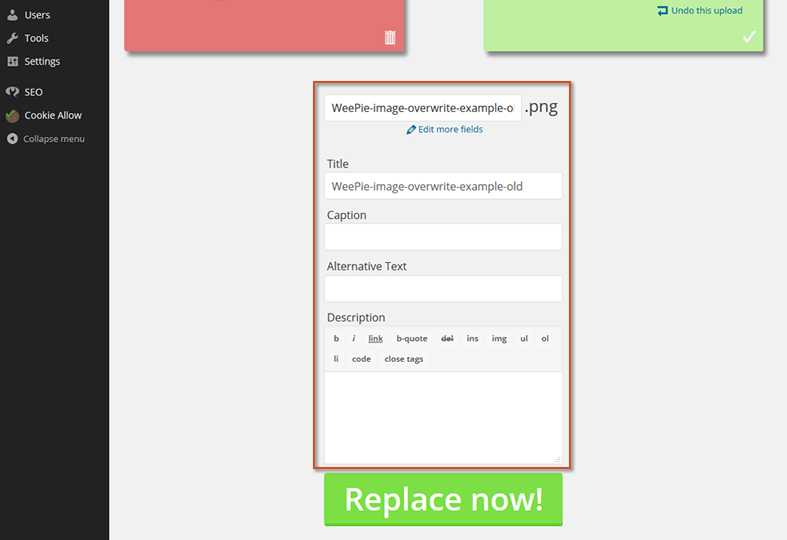
- Click on the button “Replace now!“